


Facebook Messenger for Business API: Complete Guide
The Messenger API allows businesses to streamline their conversations, customise customer experiences, and offer instant support through Facebook’s messaging platform.
Customer expectations have shifted dramatically over the last decade. Nowadays, people simply won’t tolerate waiting 24 to 48 hours for an email reply. Instead, they expect quick, personalised, and convenient interactions – usually through the messaging apps they use daily. With billions of users around the world, Facebook Messenger has naturally become a vital platform for businesses to engage with their customers.
But this also brings a challenge: How can a brand manage thousands of conversations at once without overwhelming their support team? That’s where the Facebook Messenger for Business API comes in. Think of it as the behind-the-scenes powerhouse that allows you to scale customer interactions, automate routine tasks, and provide real-time responses while still keeping that personal touch.
If you’re already exploring tools like WhatsApp Broadcast for Business, the Messenger API is the next smart move in building a comprehensive messaging ecosystem for your brand. Both platforms play a crucial role in Meta’s broader vision of streamlining business communication across different channels.
In this article, we’re excited to walk you through everything you need to know about the Facebook Messenger for Business API. We’ll cover what it is, how to set it up, why having a Business Manager account is crucial, and how you can use it boost your business. Plus, we’ll share some best practices, real-world examples, and insights into the future, so by the end, you’ll feel ready to dive into the Messenger API for your brand.
As Mark Zuckerburg once said, “Our goal is to make it so that businesses can engage with people in the same way friends do – quick, personal and useful.”
What is the Facebook Messenger for Business API?
At its core, the Facebook Messenger for Business API serves as a tireless digital receptionist for your business. Instead of manually replying to every message, this API allows your system – whether it’s a chatbot, CRM, or helpdesk platform – to seamlessly send and receive messages through Messenger.
Unlike the regular Messenger app, you use to chat with friends, the API is designed for scalability and automation. It enables businesses to handle thousands of conversations at once, ensuring that no customer goes noticed.
Think of it like this:
- Messenger (the app) = You having a chat with your best buddy.
- Messenger API = Your business connecting with 1,000 “best buddies” all at the same time, without missing a beat.
So, why do this matter?
The Messenger API does more than just send out basic “Hello, thanks for reaching out” messages. It opens the door to:
- Automated customer support (delivering quick answers to frequently asked questions).
- Transactional updates (like shipping confirmations or payment reminders).
- Personalised engagement (providing product recommendations based on user preferences).
- Interactive conversations that use buttons, quick replies, or even structured templates.
Of course, all of this has to comply with Meta’s strict guidelines. Businesses can’t just blast out random promotions whenever they feel like it. Meta has rules in place, such as the 24-hour response window, which allows you to respond freely within 24 hours of a user’s last message. After that, you’ll need special message tags or user opt-ins.
In simple terms: The Messenger API transforms Messenger from a casual chatting app into a professional communication tool – one that can stand toe-to-toe with email, SMS, and even phone calls in certain industries.
What are the Key Elements of the Messenger API?
Let’s dive into the key elements of the Messenger API, which you can think of as the vital parts of a car that keep everything running smoothly. Understanding these components will really help you appreciate the system’s flexibility and power.
- Page Access Tokens
Think of access tokens as your “digital” keys. If you want to send messages as your Facebook Page, you need one of these tokens.
Short-lived tokens are only good for a few hours and are mainly for testing.
On the other hand, long-lived tokens can last up to 60 days, making them essential for real-world applications.
Without these tokens, your app won’t be able to communicate with Messenger on behalf of your business page.
- Webhooks
Webhooks are like your business’s notification system. Instead of constantly checking Messenger for new messages, Facebook sends updates directly to your server.
For example:
A customer asks, "Where’s my order?"
Messenger triggers your webhook with that message event. Your system processes it, checks the order status, and sends back a response automatically.
It’s quick, seamless, and efficient.
- Endpoints
Endpoints are the URLs you use to tell Messenger what you want to do.
Here are some of the most commonly used ones:
- /me/messages → Send messages to users.
- /me/message_creatives → Create reusable message templates (perfect for campaigns).
- User Profile API → Get customer information like name or location.
- Attachment Upload API → Send media files (images, videos, PDFs).
Each endpoint serves as a "door" to a specific Messenger function.
- Supported Message Types
The Messenger API is more than just basic text messaging. It opens up a world of creativity with various structured formats:
- Text messages: The core of communication.
- Quick replies: Pre-set options for users to choose from (like “Yes” or “No”).
- Templates: Eye-catching designs that include buttons, images, and links (perfect for showcasing products).
- Attachments: Add files, images, audio, or video to make conversations more dynamic.
Imagine a customer asking about today’s menu. Instead of sending a long-winded paragraph, you could provide a list template with clickable buttons. It’s faster, cleaner, and way more engaging.
- Compliance Rules
While it may not be a “technical” detail, it’s incredibly important. Meta has laid out some clear guidelines:
- Respond within 24 hours of customer interaction.
- Use approved message tags for communication after 24 hours (like shipping notifications).
- Steer clear of spamming customers or misusing the API for unsolicited promotions.
Breaking these rules could result in restrictions on your messaging capabilities - or even worse, a ban on your app.
“The messenger API isn’t just about automation – it’s about fostering genuine human connections. You want every customer to feel like they’re chatting with a real person, even if it’s through software.”
Business Manager Account and Its Function
To really tap into the full power of the Messenger API, you first need to get through an important gatekeeper: the Meta Business Manager. Think of it as your main control centre for everything related to Meta - your Facebook Pages, Instagram accounts, ad campaigns, team members, and, most importantly, your applications.
Without the Business Manager, you simply can’t access the Messenger API. Why is that? Because Meta wants to ensure they know:
- Who you are (business verification).
- What assets you’re managing (pages, apps, ad accounts).
- Who’s in charge of those assets (team roles).
It’s a bit like having to register your business with the government before you can start sending out invoices. You need to prove that you’re legitimate.
Why Does It Matter?
Let’s dive into what the Business Manager for Messenger API really means:
- Centralised Management: Imagine having all your Pages, apps, and permissions neatly organised in one spot. That’s what Business Manager does for you.
- Business Verification: Before you can tap into those API permissions, Meta requires businesses to get verified. This means you’ll need to submit some documents, verify your domain, and a few other things.
- Role Management: You can easily assign different roles - like developers, admins, and support staff - without having to share your personal Facebook credentials. How convenient is that?
- Compliance Monitoring: With Business Manager, you can rest easy knowing that you’re sticking to Meta’s rules, including data management and GDPR compliance.
In short, think of Business Manager as the “passport” your business needs to explore the Messenger ecosystem.
Steps to Set Up Business Manager
Let’s break down the setup process step by step.
- Create a Business Manager Account
Head over to business.facebook.com
Click on Create Account and follow the prompts (you’ll need your business name, email, and so on).
- Verify Your Business
You’ll need to submit some official documents (like your tax ID, incorporation papers, or utility bills).
Make sure to confirm your website domain within Business Manager.
Then, just wait for Meta to review and approve your submission.
- Add Your Facebook Page
Go to Business Settings → Pages → Add Page.
You’ll need to either own the Page or have admin rights to it.
- Create a Developer App
Visit Meta for Developers.
Start a new app (select Business as the app type).
Link it to your Business Manager account.
- Assign People and Roles
Bring in developers to help with integrations.
Add customer support reps for smooth live chat transitions.
Keep track of who has admin rights.
- Request App Permissions
Messenger requires specific permissions like pages_messaging.
Submit your app for evaluation.
Don’t forget to provide screencasts or test accounts so Meta can verify how you’re using the API.
A Quick Example
Imagine this: you’re running an online clothing store.
You link your Facebook Page to Business Manager.
Next, you set up an app in Business Manager, connect it to Messenger, and ask for the necessary permissions.
Once Meta gives it the thumbs up, you can create a Page Access Token.
Now, your developers can start sending automated order notifications through Messenger.
Without Business Manager, this whole process wouldn’t even be possible.
Why Verification Matters
Meta is pretty picky about who gets API access. Think of Business Manager verification as a badge of trust. By getting verified, you’re telling both Meta and your customers:
- “Yes, we are who we say we are.”
- “Yes, we will handle customer data responsibly.”
- “Yes, we will use messaging in a way that benefits users.”
In the end, this is a win-win for everyone. Customers are more likely to trust messages from verified businesses, and Meta effectively reduces spam and misuse.
“Verification isn’t just a hurdle—it’s a sign of trust. If you want your audience to feel safe when engaging with your brand, that blue check of authenticity is crucial.”
Use Cases with Facebook Messenger for Business API
At this point, you might be thinking, "Okay, the setup looks solid, but what can I actually do with it?" That’s where the Messenger API really shines - it’s not just about answering questions; it’s about transforming the way your business connects with customers.
Here are some powerful (and practical) ways businesses are currently using the Messenger API:
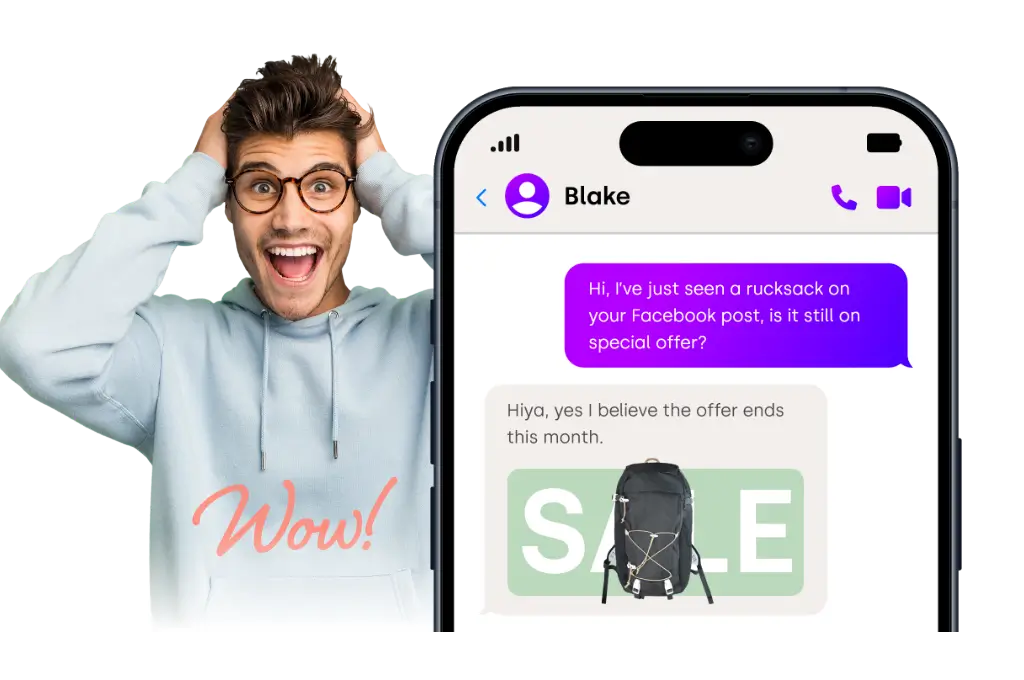
- E-commerce: Turning Browsers into Buyers
Picture this: a customer lands on your Facebook Page, curious about your latest shoe collection. Instead of waiting for a team member to get back to them, the Messenger bot steps in right away:
"Hey Alex, looking for sneakers? Check out these top three trending styles!"
The customer can see images, prices, and a “Shop Now” button—all within Messenger. If they decide to buy, the system can follow up with: "Thanks for your order! Your sneakers will arrive by Thursday. You can track your package here."
It’s like having a sales assistant who’s always on duty.
According to TechCrunch, Messenger has been evolving into a business tool for years, supporting everything from shopping to service bookings.
- Customer Support: Faster, Friendlier Responses
Nobody likes being put on hold. The Messenger API changes that.
A customer types: "My Wi-Fi isn’t working."
The bot instantly replies with troubleshooting steps.
If the issue persists, the conversation seamlessly shifts to a live agent.
This way, simple problems get resolved in seconds, and your human team can focus on the trickier cases.
It’s a win-win for the business and a stress-free experience for the customer.
- Lead Generation: Conversational Marketing
Messenger isn’t just for support; it’s also a key player in bringing in new leads.
Imagine this: you’ve got a Facebook ad that says, "Want a free skincare consultation? Start chatting with us now!"
When users click on it, Messenger pops up.
The bot kicks things off with some friendly questions: "What’s your skin type?" or "Do you prefer natural products?"
All the answers get logged in your CRM, giving your sales team a warm lead to follow up on.
It feels like a casual chat, but behind the scenes, your business is collecting vital customer info.
- Service-Based Businesses: Appointments Made Easy
Think about salons, gyms, or dental offices. Instead of juggling phone calls and endless back-and-forth scheduling, Messenger makes it a breeze.
"Ready to book your next appointment?" → Customer clicks Yes. "Great! Here are the available time slots for tomorrow: 2 PM, 4 PM, or 6 PM." The customer picks one, and just like that—it’s all set.
No fuss, no missed calls, just a smooth experience.
- Logistics and Delivery: Real-Time Updates
For delivery services, the Messenger API is like a customer’s best friend.
"Your package is on its way."
"Your driver will be there in 10 minutes."
"Your order has been delivered. Thanks for shopping with us!"
It keeps customers in the loop without them needing to call or check an app.

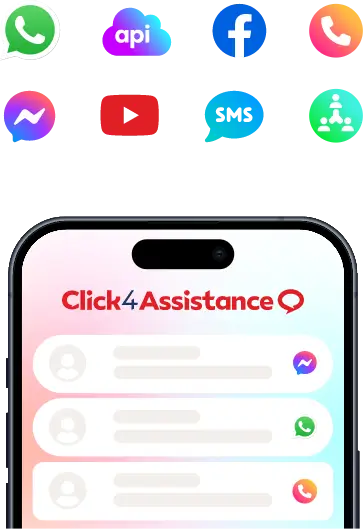
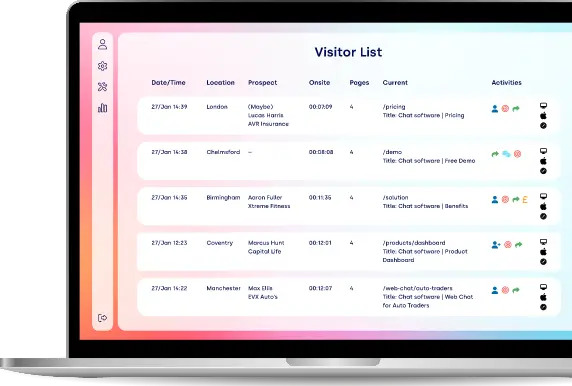
All Messaging Channels from One Platform
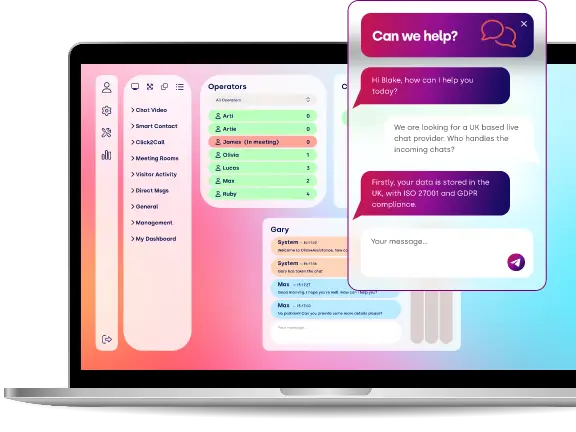
Handle all your customer interactions from live chat, WhatsApp and Facebook Messenger within one powerful platform.
How to Set Up the Messenger Business API
Setting up the Messenger for Business API might feel a bit overwhelming at first, but once you break it down, it’s really just a series of straightforward steps. Think of it like getting a new phone: you take it out of the box, install your apps, log in, and you’re good to go. The Messenger API works in much the same way - you get your account ready, connect the necessary parts, and soon enough, you’ll be chatting with customers automatically.
- Create a Facebook App
Every integration with Messenger starts with an app on Meta’s developer platform. Don’t let the word “app” scare you - it’s just the digital bridge between your Facebook Page and the Messenger API.
Log into Meta for Developers.
Click on Create App and select Business as the app type.
Fill in some details (like your business email).
This “app” acts as the identity that allows your business to officially communicate through Messenger.
- Connect Messenger
Once your app is up and running, you’ll need to add Messenger as a product. Think of it as turning on a feature in your toolkit. With just one click, your app unlocks Messenger’s capabilities.
- Generate a Page Token
Now, you’ll give your app permission to operate on behalf of your Facebook Page. The token acts like a digital “keycard.”
Go to the Messenger settings in your app.
Choose the Page you want to connect.
Generate a Page Access Token.
👉 Just a heads up: short tokens are meant for testing only, while long-lived tokens keep your system running smoothly in production.
- Configure a Webhook
Alright, we’re diving into some technical stuff here, but don’t worry—it’s super important.
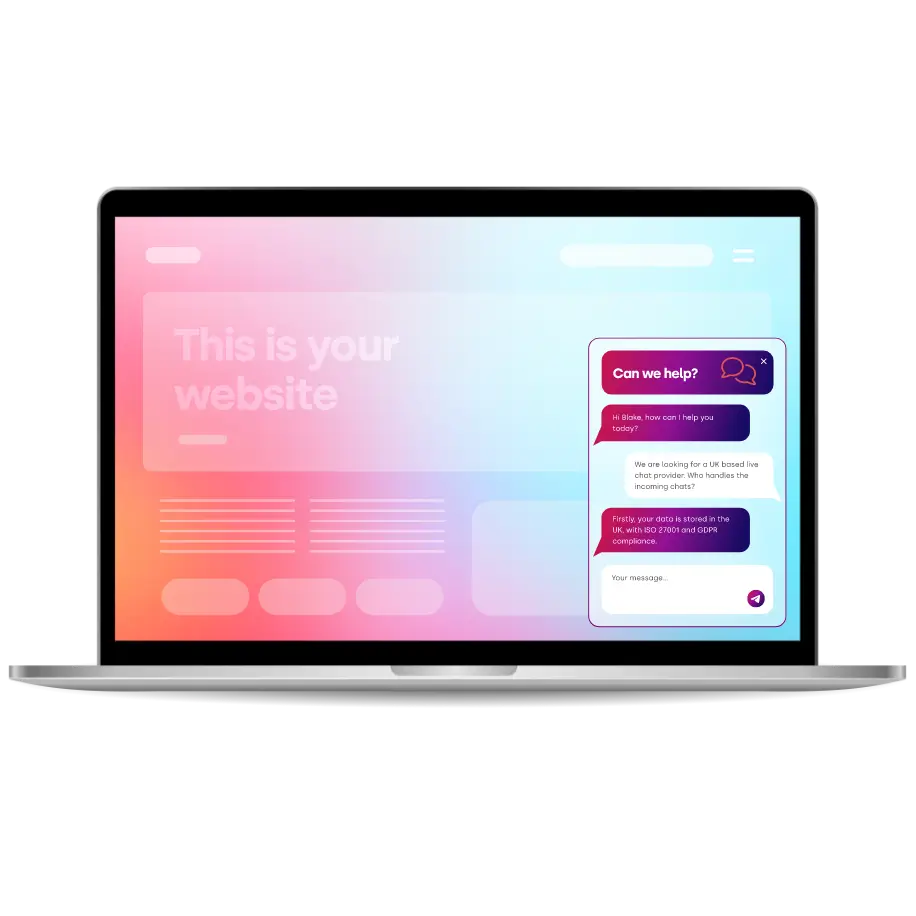
Think of a webhook as Messenger’s way of giving you a nudge, saying, “Hey, you’ve got a new message!” Instead of you having to check for updates all the time, Messenger does the notifying for you when something happens.
You’ll need to provide Messenger with a URL (like yourserver.com/webhook).
Messenger will send new messages and events to that URL in real-time. Meta offers a great webhook setup tutorial to help you get it right.
Your system will then interpret those updates and decide how to respond.
It’s like having a receptionist who lets you know whenever someone calls, so you don’t have to keep picking up the phone every 10 seconds to check if there’s a call.
- Send a Test Message
Once your token and webhook are all set up, it’s time for the big moment: sending a message back to a customer.
Picture this scenario:
A customer asks: “Has my order been shipped yet?”
Messenger alerts your webhook.
Your system pulls up their order details.
You reply through the API with: “Yes! It left our warehouse this morning. Here’s the tracking link.”
No need for complicated coding—just set up the flow so Messenger and your system can chat with each other.
- Seek Approval from Meta
Before you go live, Meta wants to make sure you’re not sending out spam. This means you’ll need to submit your app for review. Here’s what you’ll need to do:
- Request permissions like pages_messaging.
- Show Meta how your integration works (usually with a quick screencast).
- Then, just wait for approval (this might take a few days).
- Once you get the green light, you’re all set to use the Messenger API with real customers!
Frequently Asked Questions
- Do I need a Business Manager account to use Messenger API?
Absolutely! A verified Business Manager account is crucial for accessing the Messenger API features and confirming your business identity with Meta.
- Can small businesses benefit from the Messenger API?
For sure! Small businesses can use the Messenger API for things like order updates, answering common questions, or gathering leads—all without the need for a big support team.
- Is there a fee for using the Messenger API?
Yes, there is. While Meta doesn’t charge for the API itself, you might incur costs if you connect it with third-party services or run ads that lead to interactions on Messenger.
- How does the Messenger API differ from the WhatsApp Business API?
The Messenger API is tailored for Facebook users, while the WhatsApp API targets a global audience on WhatsApp. Many businesses use both to broaden their reach.
- Can I send promotional messages via the Messenger API?
Not without some rules. Messenger has strict policies—you can only send promotional content if the user has opted in or if you’re using approved message tags like updates.
Conclusion
The Facebook Messenger for Business API is more than just a technical gadget; it’s a powerful bridge connecting your brand with your customers. Whether you’re helping shoppers find that perfect item, keeping clients updated on their orders, or generating fresh leads, the Messenger API lets you engage in meaningful conversations while still keeping that personal touch that everyone loves.
Sure, getting started does require a bit of groundwork—like having a verified Business Manager account and some configuration—but the rewards are well worth it. You’ll gain access to a tool that’s fast, reliable, and trusted by millions around the world.
So, what’s the bottom line? The Messenger API isn’t here to take the place of human interaction; it’s designed to enhance it. It handles the repetitive tasks, freeing up your team to focus on building real connections. In the end, this mix of automation and authenticity is what will set your brand apart from the competition.
And, if you’re curious on how artificial intelligence fits in with the Facebook Messenger for Business API, you can see how the AI Chatbot from Click4Assistance achieves this.
Thousands Trust Us. Will You?
From live chat to AI-powered chatbots and social integrations, Click4Assistance powers real-time engagement - fully UK hosted and trusted across industries.